


Final Fantasy Resonance kapittel 3 gjennomgang: Vannhulen, Leviathan og Alluvion


 Square Enix
 Fantasy
 Leviatán Esports
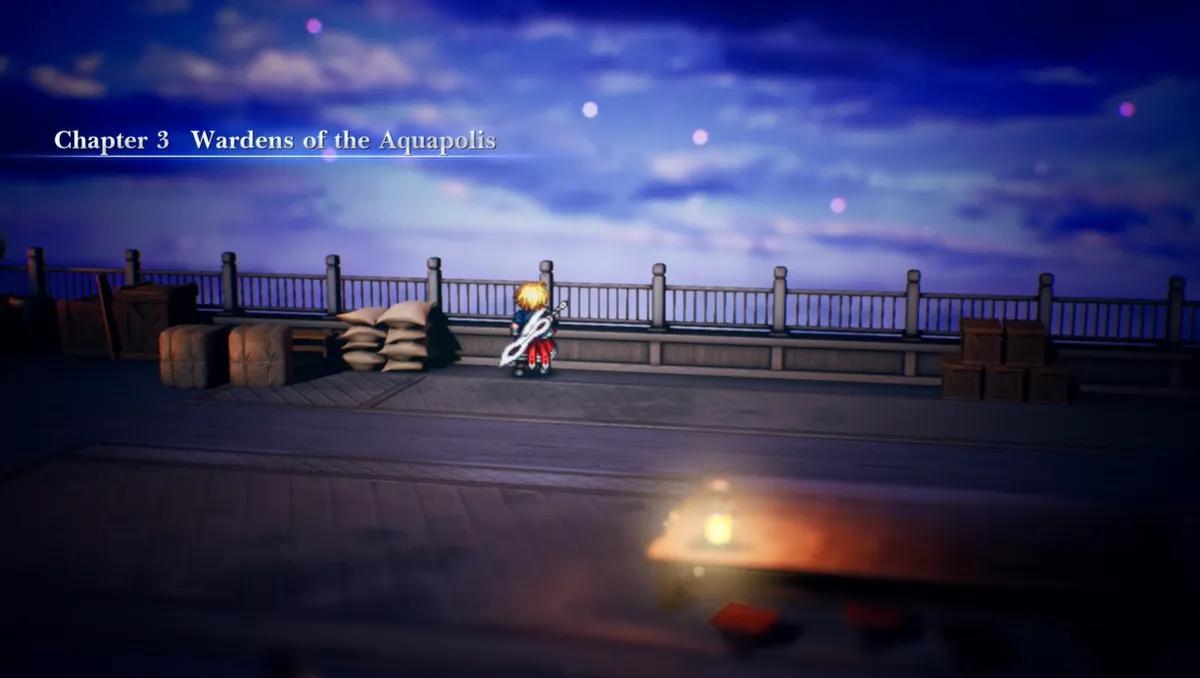
Chapter 3 is the longest stretch of Final Fantasy Resonance so far and the one that costs the party the most. Olderion hands over a fifth party member, a new tactical system, a Vision and two of the game's better puzzle dungeons. It also takes two characters away and answers the question of who Fina actually is.
Wardens of the Aquapolis Quest Overview
The chapter runs from the crash landing on the Olderion coast to the ship heading for Zoldaad. The events before it, including the Wind Shrine and Aether, are in Final Fantasy Resonance Walkthrough: Chapter 2.
Chapter | Chapter 3: Wardens of the Aquapolis |
Starting location | The Olderion coast, south of the aquapolis |
Main objectives | Find the Water Maiden, purify the waterways, reach the Water Shrine |
Bosses | Wave Lopros with two Snappers, Water Dragon, Leviathan, Alluvion |
Visions unlocked | Firion |
Party member added | Nichol, with Formations |
Permanent buffs | Two dialogue choices, one for Lid and one for Nichol |
Ends with | The ship leaving Olderion for Zoldaad Empire Territory |
Two warnings worth taking seriously. The Olderion wilds average Level 25 and up, so exploring the continent before the Cave of Waters goes badly. And Alluvion at the end has 48,000 HP, which is more than Aether and the Water Dragon combined. The chapter list sits in the Final Fantasy Resonance Walkthrough: All Chapters hub.
Olderion: Shops, Jump Rope Rewards and Meeting Nichol

The chapter opens on Lid's airship, where she talks through what happened to Evan. A dialogue choice follows and every answer gives her a permanent buff. Telling her the party has her back gives +3 Strength, suggesting there might be a reason behind her brother's change gives +3 Magic, and pointing out that siblings stay siblings regardless of distance gives +3 Stamina.
The airship then fails and Lid puts it down on an Olderion beach, where it stays. She admits she never took it for a test run and that some of the parts were cheaper than they should have been.

Elsewhere, Aether reports the Wind Crystal destroyed to Umbra and Lazarov aboard The Invincible, with Evan standing nearby under Lazarov's control. A fourth member of the Sworn Six arrives, Alluvion, who teases Evan about the idea of killing Lid and gets a flat answer about money. She is carrying the Divine Signet taken from Grandshelt.
A short flashback shows Rain as a child, terrified of something happening to his arm, while his father looks in and leaves without a word. Remember it, because the chapter comes back to it.
Back in the present, the party is stranded on a beach with a broken airship, which at least settles the question of what to do next.
Take the north path to the aquapolis. The arrival scene has everyone taking in the architecture and the canals cutting through the city before they split up to explore, which is the routine by now.

The game also mentions that ships can now reach Olderion from Grandport or the pier near Dilmagia, so the continent is not a one-way trip and anything left unfinished on the first two is still reachable.
Run left to the Inn and save. The kids jumping rope outside are not decoration. The girl with an exclamation mark challenges Rain to beat her record of 10 jumps, and jumping each time the mark appears over his head pays out 1 x Magicite Shard. Come back after meeting Nichol and she raises it to 15 jumps for 1 x Mist Hi-Potion.
Run further left to the man standing by a gondola and choose Toward Old Town. The city is one connected grid and you can walk the whole thing, but the gondolas cut the travel time noticeably, and you will be crossing it several times this chapter.
Cross the bridge running underneath the raised waterway. The locals on the far side carry main story icons, and the square holds a Tablet Shard beside the central tree plus a coffer with the Rock Piercer for Fina, which trades Magic Attack and Sanctity for a large Physical Attack increase.
The man near the tree explains that the Water Shrine sits behind a barrier maintained by a native clan called the Wardens of the Waters. The soldier near the southern bridge adds that Olderion's water carries a property that keeps monsters away, which is why the corruption matters. He also mentions a Warden last seen on the northwest side of the city.
Before chasing him, clear the all-in-one shop on the southeast side, where the Moogle of Light is also parked. Three Silver Chestplates at 3,300 Gil cover Rain, Lasswell and Lid, and a Lunar Eclipse Robe at 2,900 Gil covers Fina. On weapons, the Greatsword at 5,500 Gil suits Rain, the Hototogisu at 5,250 Gil suits Lasswell, the Elfin Bow at 4,500 Gil suits Fina, and the Warpick at 5,500 Gil is the better of the two options for Lid. Restock Tents and Ethers while you are there.
Backtrack across the long bridge and find the robed man kneeling by the water near the gondola. Nichol introduces himself as one of the Wardens, having already worked out that the water is contaminated. He refuses to let strangers near the shrine with the Sworn Six actively destroying crystals, and then a soldier interrupts with news of monsters at the Cave of Waters northeast of the city.
Cave of Waters: Boat Puzzles, All Treasure and Wave Lopros

Leave through the main south exit and follow the Overworld path east and then north until the cave appears on the right.
Nichol is already at the entrance with a group of soldiers when the party arrives, and he asks outright whether they have been following him. Rain points at the Sworn Six as the reason and the subject drops.
The voice echoing through the cave is the Maiden singing her daily prayer, and with the water at risk, Nichol wants her safe before anything else. Rain offers to help with that, Nichol agrees without warmth, and Nichol joins the party.
He brings Formations, which are party-wide buffs only he can use, and he unlocks more of them as he levels. Four are available from the start.
Assail increases the stagger power of every ally, which is the one you will reach for most often, since almost every boss in this chapter is decided by stagger speed. Charge raises the critical hit rate across the party. Bulwark raises both physical and magic defense, and it is the answer to the party-wide water attacks that most of Olderion throws at you. Fluid Warfare grants an additional action after using a Formation, which turns the setup turn into something closer to free.
He has his own gear and Vision slots, and swapping him into the active party is done through the Party sub-menu rather than happening automatically.
The dungeon itself runs on water levels, which is the template for both of this chapter's dungeons. Pedestals raise and lower the water, boats move you across it when it is high, and most of the treasure sits off the direct route rather than along it. Nothing here is timed, so clear it properly.
Save, follow the path right and north, then interact with the pedestal on the right to raise the water and reach the boat. Row west and north first for the opening coffer, then work around the room to the east side. Before disembarking at the northeast exit, row into the side room on the right for the coffer sitting on its ledge.
Head into the next area and raise the water with the pedestal in the top-right corner, then row north. The winding route leads to two exits along the north side, and the far-left one drops into a hidden section worth clearing before you take the right-hand exit.
In that last room, the pedestal in the northwest corner lowers the water so you can reach a coffer on the floor, then raises it again so the boat can carry you out.

The cave holds seven pickups:
- 1 x Magicite Shard, the first coffer northwest of the starting boat
- Total Calisthenics for Nichol, on the ledge in the side room before the northeast exit
- Tablet Shard, on the ground immediately left after disembarking
- 3 x Shuriken, north of the second boat
- 2 x Ice Scrolls, in the hidden section behind the far-left north exit
- Ninja Gear, reachable only with the water lowered in the third room
- Tablet Shard, in front of the waterfall on the entrance room's upper level
Total Calisthenics gives Nichol a large Physical Attack jump at the cost of Magic Attack, and Ninja Gear adds a 15% chance to evade physical attacks.
Back on the entrance room's upper level, lower the ladder, save at the Save Point to the left and use a Tent. Three monsters are blocking the room ahead, and Nichol wants the two smaller ones dealt with first.
All three sit at Level 20. Wave Lopros is weak to Ice and drops a Water Scroll I, the Land Snapper is weak to Wind, and the Azure Snapper is weak to Thunder.
Open with the Assail Formation to speed up the stagger meters, or Bulwark if the damage is landing harder than expected. Fina summoning Siren covers the Land Snapper's Wind weakness and can stick Charm or Poison on the group.
Wave Lopros is the one to watch while you clear the front line. Aqua Breath hits the whole party with Water, Stranglehold targets one character and can inflict Paralysis, and Shamshir is a straight physical hit.
Its actual mechanic is Devour, and it targets its own side.
At some point the battle HUD notes that Wave Lopros is eyeing its prey and a reticle appears over one of the two Snappers. If that minion is still standing when its turn comes around, Wave Lopros eats it, heals itself 2,000 HP and gains either Faith or Bravery for the next four or five turns.
That makes the fight a priority puzzle rather than a damage race. Kill the marked minion before the devour lands, and the attempt fails. Kill both and it summons two more, which is fine, because every turn it spends on the devour cycle is a turn it does not spend attacking. Work its stagger meter in between.
Luka, Nichol's sister and the Water Maiden, steps out from behind the pedestal when the fight ends. Save on the way out and fast travel back to Olderion.
Purifying the Waters and How to Beat the Water Dragon

Nichol identifies three key points along the city's waterways and asks the party to survey them with Luka.
The first sits on the bridge overlooking the canal to the right of the Inn. Approach it and Luka begins the purification, singing her prayer over the water.
When she finishes she admits the corruption runs deeper than she expected and that impurities are still there, so she sings it a second time. The conversation afterward covers her family and how the role of Maiden passed to her, and it is the first sign that she did not choose any of this.
Cross the bridge and detour right. Dalim stands at the far end with clues about a puzzle and an Esper somewhere in the region. Further along, a Tablet Shard sits on the ground near a woman, and Sarah by the railing across the canal hands over the Medicinal Mission sub-quest. The dead end to the north holds a coffer with the Mirage Robe, which adds a 15% chance to evade magic attacks and suits either Nichol or Fina.
Backtrack to the bridge and go left to the plaza with the statues, north across the bridge where the soldier stands, then northeast across another bridge to the canal near a gondola. Luka sings again, falls short again, and collapses from the effort. Rain leaves Fina to look after her, and the scene that follows has Luka admitting she has never left Olderion.
The third point sits a little over halfway across the long bridge to the left. Before Luka can finish, El arrives with news that monsters have broken into Old Town, which means the corruption has outrun the Wardens. He is Nichol's older brother, he wants nothing from outsiders, and he runs back without waiting.
Rest and save at the Inn before following, and spend anything left at the shops.

Old Town is overrun. The first encounter is a Ribosome flanked by two Green Souls, and the Ribosome is weak to both Water and Stone. El then heads north to help his wife Arsha evacuate, and the party argues about whether to hold the line or follow him. Nichol takes the strategically correct position of staying put, Rain tells him exactly what he thinks of abandoning a brother over odds, and the group splits.
Lasswell stays with Nichol. Rain, Fina and Lid go after El, so set that party up before continuing.
Save the boy being attacked by a worm monster, then open the nearby coffer for 1 x Ether. West and north, an Ogre Mage waits flanked by two Goblin Mages. Kill the Goblin Mages first because they spam Silence and Confuse and have almost no HP. The Ogre Mage casts Aero and Blizzaga, which Shell or Shellga softens, and it is weak to Wind and vulnerable to Charm, Silence and Sleep, so Siren does good work.
North and then east, another soldier is being attacked by worm monsters. Clearing them triggers a scene where he reports that El is dealing with something considerably bigger further east.
Before going after him, use the soldier with the Inn icon near the square to heal the party and save at the Save Point beside him. Then clear the last two detours. The narrow path to the right holds 3 x Lightning Scroll I, and south of there a cat is being attacked by a Ribosome, with a coffer on the broken bridge nearby holding 1 x Mist Hi-Potion.
Go back to the Save Point and refresh the party once more before engaging.
Approach the monster El is fighting. Rain cuts off his next complaint by telling him he did the right thing standing alone for someone he loves, Arsha agrees, and El finally fights alongside the party.

Water Dragon is Level 21, weak to Thunder, and drops a Potion.
The multiple heads are for show. Its kit is Aqua Breath, Blaze and Watera on the magic side, which Shell or Shellga covers, and Octo-strike on the physical side, which Protect or Protectga covers. The one thing to plan around is that it occasionally goes berserk and takes an extra action in the same turn, so keep the party's health topped up rather than healing to a margin.
Everything else is Thunder into the stagger meter until it drops. There is no second phase and no gimmick, which makes it the most straightforward boss in the chapter and a reasonable place to test how far Nichol's Formations have come.
The reunion afterward brings Lasswell, Luka and Nichol back together with El and Arsha, and for a few minutes the chapter lets the family have something.
How to Beat Leviathan at Lake Dorr

The reunion afterward turns into a problem. Clearing the corruption at its source means speaking to the Water God, Leviathan, at Lake Dorr, and reaching the lake means going back through the Cave of Waters.
Head to the Inn to heal and save, then leave through the south exit and take the same path east to the cave.
Save at the entrance and take the room directly to the left, where Luka chants the water down and reveals the route to Lake Dorr.
While the others go ahead, she asks Fina for a private word and admits she wants a life outside her duties as Water Maiden, pointed at one particular person she does not name. The conversation ends lightly, which makes the rest of the chapter worse. The tunnel comes out on the Overworld with Lake Dorr a short walk ahead.
Alluvion is waiting. On top of releasing monsters into Olderion, she has used the Divine Signet to drive Leviathan into a rage, and Luka intends to sing him out of it while the party fights him.

Leviathan is Level 23, weak to Thunder, resistant to Water, and drops a Magicite Shard.
Open with Shell or Shellga, Protect or Protectga, and Nichol's Bulwark Formation, because Leviathan opens with Maelstrom, a party-wide Water attack that does real damage.
Rain flags the actual mechanic before the first turn, which is that the glowing orbs circling Leviathan have to go first.
The Orbs of Light are also Level 23 but carry very little HP, and the first set is weak to Fire, so a couple of Fire spells clears them. Killing them weakens Leviathan's Rampage and lets Luka's song get through, which pulls him out of the rage Alluvion put him in. That does not end anything. He still has to be beaten, and the stagger meter is still the route to it.
The cycle then repeats twice with different colors. The second orb is red and weak to Water. The third is green and weak to Stone. Each one needs a different element, which is the entire reason the fight exists.

In between, Leviathan uses Aqua Breath and Waterga on the magic side and Slam and Rampage on the physical side, and eventually fires his Limit Burst, Tsunami, for heavy Water damage across the party. Keep Shell up permanently and heal immediately after it lands.
Winning does not end the scene either. Alluvion uses the Divine Signet to seize control of Leviathan a second time and fires a massive attack that drops everyone in the party except Luka.
Alluvion tells her the prayers are pointless. Luka reaches him anyway and turns his fury back on Alluvion, which is enough to make her retreat and leave the party conscious.
Luka then explains what the victory actually cost. The corruption Alluvion caused runs deep enough to take years to cleanse, and cleansing it means descending to the bottom of the lake and staying down there to do it.
Nichol takes it worse than anyone, and both of them know there is no alternative. Her one request is that her new friends think of her whenever the waters of the Olderion Federation light up from her prayers. Then she goes.
The Flood, Archwitch Fina and How to Unlock Firion

Back in the aquapolis, Rain suggests resting before deciding anything. Save before speaking to the Innkeeper, because sleeping triggers the next scene immediately.
The city is flooded by morning, and Alluvion turns up to take credit for it. When she flashes the Divine Signet, the shockwave wakes something in Fina, the same way it did at the Dirnado dock.

Her manner changes completely. She walks up to Alluvion without hesitation, talks to her like an old acquaintance, and Alluvion asks whether she is Archwitch Fina. That is the reveal: the woman from the prologue, hiding in plain sight for centuries.
She fires off a spell powerful enough to send Alluvion running and then complains that centuries ago the same spell would have destroyed her outright, which says more about what she has lost than about Alluvion.
Stopping the flood means reaching the Water Crystal inside the Water Shrine. Nichol adds a step: the party has to stop at Waterfall Way first and collect something that gets them past the barrier.
Fina also fights differently now. Her moveset is altered and she carries a whip instead of a bow, so run an encounter before doing anything important and look at what she has gained and lost. The weapon change matters at the shops too, because the bow upgrades you have been buying for her no longer apply.
Save at the Inn before leaving the city through the south exit. The continent is also safe to explore at this point, with several levels and a full party behind you.
A Sanctum of Light sits southwest of Olderion inside a forest. The monsters around it run in the mid twenties, so approach it with the party the chapter has given you rather than at the level you arrived with. Three questions from the Will of Light hand over Firion, a Breaker-type who pairs well with either Lid or Nichol.
Waterfall Way: Gilgamesh, All Treasure and the Altar

Waterfall Way is west of the city, a cliffside buried under waterfalls with a rocky path running up the middle to a soaked entrance.
Nichol explains that the magic needed to drop the shrine barrier sits at the Altar of the Water Maiden somewhere inside the cave.
Before the party can move, Rain's arm flares up exactly as it did in the childhood flashback and he goes down. While everyone else panics, Archwitch Fina stays calm and tells him what it is: a power inside him that he has not understood or claimed yet.
She quiets it for now and refuses to explain further when Lasswell presses her, calling it a secret between herself and Rain.

He laughs off Lasswell's demand for answers and the scene ends on a comic beat between Lasswell and Lid, which is the game's way of letting the tension drop before the dungeon.
In the first area, follow the path immediately right behind a waterfall to a ledge with a coffer holding 2 x Eye Drops. Backtrack and take the stairs to the upper path, head right past the waterfall to a long ladder, and grab the Tablet Shard in the corner before climbing it.

Gilgamesh is standing to the left at the top, too preoccupied to start anything. Interacting with him gets a comedy scene and he leaves down the nearest waterfall rather than fighting, but he does drop a useful line: the Genji Gloves he stole in Chapter 1 come back when the party is strong enough to take them.
There is a hidden ledge just below him with a short ladder down to a coffer holding Devout's Armor, which adds 25 MP.
Continue left through the long waterfall corridor and keep going until a ladder appears on the far left side, with another Tablet Shard on the ground beside it. The level above splits three ways. The south path across the bridges ends in a coffer with 1 x Phoenix Pinion, and the northmost path along the wall holds a Tablet Shard between two waterfalls. The exit is on the right.
The next room is a single ramp past a waterfall. On the way through, Rain notices something El dropped, which turns out to be an amulet Arsha gave him for protection, and the two of them have the conversation about El's doubts that the rest of the chapter pays off.
In the chamber, the spirit of the first Water Maiden appears and recognizes Nichol as her blood, then asks whether Olderion is in danger. He confirms it.

She offers the magic needed to breach the barrier at the shrine, with one condition attached. It has to be used at the Warden's Cape rather than anywhere else, and once she vanishes, El points out that the route there runs through the town of Amore.
Leave through the long passage behind you, save at the Save Point that has appeared, and take the exit immediately to your right. Do not teleport back to the cave entrance. The right-hand exit puts the party on a different part of the Overworld with a bridge path leading straight to Amore.
Amore: Every Shop Upgrade and the Road to Warden's Cape

Rain's arm gives out again as the group walks through the town gate and he collapses in the street. The party books into the Inn while he recovers, and the scene shifts to the room upstairs.
Archwitch Fina buys him relief and then tells everyone the truth. It is temporary, and Rain dies if he does not get control of the power. The Water Crystal is the fastest way to help him, and using it that way takes it away from flooded Olderion. Rain picks Olderion without pausing. Later that night, El overhears Fina and Nichol discussing an alternative she describes as extraordinarily risky, and the scene cuts before she says what it is.
The next morning, go back into the Inn and up the stairs on the left. The first room on the second floor has a coffer with an Aegis Robe.
The shops sit on the right side of town with the Moogle of Light beside them, and they are worth emptying because Chapter 4 does not open with a bargain. On armor, a Kenpo Gi at 5,000 Gil or Knight Armor at 5,500 Gil fits Rain, a Bard's Tunic at 4,500 Gil fits Fina, and a second Knight Armor fits Lid. On weapons, Icebrand at 7,700 Gil suits Rain, though it imbues his attacks with Ice, which is worth remembering against anything that resists it. Shiranui at 7,350 Gil is a large jump for Lasswell, and the Leather Whip at 7,000 Gil matches Fina's new weapon type.
Three more pickups are scattered around town. The coffer at the right end of the path holds 2 x Water Scroll, a Tablet Shard sits by the well down the south path, and another Tablet Shard lies beside a tree on the north side. Up the ramp to the left of that tree, a soldier hands out The Tide From the Sky sub-quest, and circling the building counter-clockwise from the bottom of the ramp finds a coffer hidden under the stairs with the Morning Star for Lid, which adds 10% Magic Attack.
Leave through the bridge exit on the north side and follow the path northwest down the slope. The Water Shrine is visible on a standalone cliff, still sealed inside its barrier, and Nichol uses the first Water Maiden's magic to raise the stone bridge across to it.
Every Water Shrine Crate Puzzle and Coffer

Nichol lowers the barrier at the entrance and Alluvion immediately proves she was waiting for exactly that. With Olderion flooded, she knew the party would need the shrine and that the barrier would have to come down for them to get in. She knocks everyone unconscious with a single water attack and walks inside.
El survives it, protected by his brother's shields, and goes after her alone because he knows the shrine better than she does.
The dungeon runs on the same water-level logic as the Cave of Waters with one addition, which is crates.

When the water is low, crates sit on the floor and can be pushed around. When it rises, they float up into position and turn into bridges. That means the solution to most rooms is lowering the water, arranging crates on the floor, then raising it again and walking across what you just built.
The other half of the puzzle is which pedestal does what. Large pedestals change the water level in a different room entirely, and small pedestals change it in the room you are standing in. Confusing the two is how people end up walking the shrine in circles.
From the start, go up and left, take the boat northwest, and use the large pedestal on the small platform to drop the water elsewhere. Row back to the entrance room, run right and take the ladder down. At the fork, left leads to a Viridian Pot and right continues the route.

In the crate room, the small pedestal to the north lowers the water and opens the lower path. Go down the stairs, push the standalone crate blocking the doorway south until it lines up with the others, then raise the water again with the small pedestal and cross the bridge you just built to the large pedestal on the far side.
Backtrack to the room that pedestal drained and take the now-open north path. Further on, the stairs on the right lead up to a small pedestal that raises the water for another crate bridge, and the platform past it has a pedestal that lowers it again so you can take a boat to the structure in the center. Push the crate there into the water to complete the path to the coffer above, then use the ladder and the large pedestal before rowing back and raising the water one last time.
The shrine holds seven pickups:
- 3 x Lightning Scroll I, by the stairs in the first crate room
- R'lyeh Text for Nichol, in the hidden nook behind the crate you push aside
- Tablet Shard, just left through the doorway on the north path
- Piercing Mace for Lid, across the crate bridge on the left detour
- Tablet Shard, in the right-hand corner of the central structure
- Calm Armlet, in the center coffer reached by the right-side crate path
- Tablet Shard, to the left of the ladder by the elevator platform
R'lyeh Text adds 30% to Nichol's water damage. Piercing Mace costs Lid Speed but raises both attack stats and adds 20% damage when she hits an elemental weakness. Calm Armlet prevents Confuse and Berserk.

Getting out of the central room means using the small pedestal near the northeast stairwell to drop the water again, which is the step most people forget after collecting the last coffer.
Take the left-side stairs down to the elevator platform and ride it to the bottom. Use a Tent, save, and check your Ether count before going any further. If it is low, fast travel to Amore or Olderion and come back. The fight through that doorway is the longest in the game so far and it is decided by whether you can keep casting.
How to Beat Alluvion and End Chapter 3

El got there first and used his power as a Warden to strengthen the Water Crystal for both Rain and Olderion. Alluvion interrupts him, hits him hard enough to nearly finish him, and Arsha's amulet is the only reason it does not. He pushes the last of his power into the crystal before she strikes him down again and shatters it.

Alluvion is Level 26 with 48,000 HP, weak to Thunder, invulnerable to Water, and drops the Azure Amulet. Status ailments are a waste of turns.
Thunder is the entire damage plan, which means Cloud, Firion and the Warrior of Light and a deep stack of Ethers to keep casting it. Shell or Shellga is the baseline, since Maelstrom and Waterga both hit the whole party on top of her single-target water attacks. Nichol's Bulwark adds to that, and Assail is the alternative if the stagger meter is moving too slowly.
Like Leviathan, she fights with minions. The Prism minions are also weak to Thunder, and the point of killing them quickly is that she tries to absorb them to power up her own attacks. Beat her to it and she complains that it is not enough power, and the cycle restarts with fresh ones.
Balance matters here. Pouring everything into minions means her health bar never moves, and ignoring them early means eating a boosted Maelstrom. They are a priority for the first half and much less so once she drops below 50%.
Later she starts summoning three at a time instead of two. Killing all three costs more turns than it is worth, so take one out to break the absorb and push the rest of your damage into Alluvion. Once she is at critical health, ignore the minions completely, since they are only there to waste your turns. Lasswell's Limit Burst at Level 1 is strong for stagger damage, and an Esper summon is worth holding for this, with Ramuh the standout if you unlocked him back on Mt. Thunderclap.
She panics when she loses, does not seem to know where she is, and retreats, leaving the Divine Signet behind.
Archwitch Fina picks it up. El, dying, says he failed as a Warden, and she tells him the truth instead: the power he pushed into the crystal was enough to still help both Rain and Olderion. He dies there. Fina then uses the crystal's power and the recovered Signet on Rain's arm, which triggers the memory of the Mysterious Girl visiting him as a child during one of these episodes, and he finally recognizes her.
Archwitch Fina then steps back. The Signet drained most of her power, so she reverts to the Fina the party knows, who remembers none of it. Rain picks up El's amulet on the way out.

In the aquapolis, Nichol and Rain tell Arsha. Follow the path right to the circular plaza with the tree in the center, where she comes to terms with it and Rain gives her the amulet, which projects El's silhouette the same way Emma's mother's crystal did in Chapter 1. Arsha tells him she is pregnant.
Three crystals are now gone, and the group reconvenes in the center of the aquapolis to work out where the fourth attack lands.
Lasswell lists what remains: the Lightning Crystal in the Kingdom of Pharm, the Fire Crystal in the Zoldaad Empire, and the Ice Crystal in the magiapolis. Nichol rules out Pharm on the grounds that the conditions there would stop the Sworn Six travelling through it, and rules out the magiapolis on the grounds that it may be a fable. That leaves Zoldaad by elimination rather than by evidence.
He also asks to stay with the party, and the dialogue choice that follows buffs him permanently. Asking him for strategy pointers gives +30 HP, telling him the group has his back gives +3 Magic, and telling him not to hold back on suggestions gives +3 Speed.

Take the path south from Olderion to the ship at the coast and choose Zoldaad Empire Territory. You can also sail back to Grandport Harbor or Dirnado first if there is unfinished business at a higher level now.
Zoldaad, the rebellion and the Fire Crystal are covered in Final Fantasy Resonance Walkthrough: Chapter 4 Part 1.
Common Mistakes to Avoid in Chapter 3
Exploring Olderion before the Cave of Waters. The surrounding wilds average Level 25 and up while the party arrives in the high teens. The continent opens up properly after Lake Dorr, and the game tells you so in a tip most players scroll past.
Mixing up the two pedestal types in the Water Shrine. Small pedestals change the water in the room you are standing in. Large ones change it somewhere else entirely, which is why the route doubles back on itself constantly.
Letting Wave Lopros finish a Devour. Eating a marked minion heals it 2,000 HP and buffs it for several turns. Killing the marked target first is the whole fight.
Bringing one element to Leviathan. Each of the three Orbs of Light has a different weakness: Fire, then Water, then Stone. A party built around a single element stalls at the second orb.
Teleporting out of Waterfall Way. The exit on the right after the Altar drops you on the stretch of Overworld that leads to Amore. Warping back to the cave entrance means walking the long way around.
Fighting Alluvion with Water. She is invulnerable to it, not resistant. Thunder is the only element that matters, and running out of MP mid-fight against 48,000 HP is the most common way to lose.
Clearing all three Prism minions late in the fight. Once Alluvion drops to critical health the minions are distraction fodder. Killing one to break the absorb and ignoring the rest is faster than a clean sweep.
Sleeping at the Olderion Inn without saving. Speaking to the Innkeeper after Lake Dorr goes straight into the flood scene and the Archwitch reveal with no chance to save in between.


 Vellykket kopiert... Takk for at du deler innholdet vårt!:


Kommentarer